
Whether you’re hosting private or public events, you need to collect your guests’ information before they arrive.
You also need a system to keep track of all of this information, including guest names, payment details, and the date and time of the event they chose. While some tour and event operators may try to manage their events manually, that leaves a lot of room for error.
In this post, we’ll discuss how to create a DIY event booking form and why booking software may be the better option.
- Creating a booking form in Google Forms
- Creating a booking form in Google Calendar
- Creating a booking form using a WordPress plugin
- How to optimize event booking in Xola
What is an event booking form?
Tour companies typically use an event booking form to register guests for an event or activity. When guests go to purchase a ticket for an event, they’ll be prompted with a form that asks for their name, email address, phone number, and other relevant details.
This form has two purposes: One is to collect relevant guest information, and the other is to organize that information for the operator.
Once the form is filled out, the guest will conclude their ticket purchase and receive an order confirmation email. This form will then provide your company with all the necessary information about your guest, including when to expect them and how to contact them.
When should you create one?
If you’re asking guests to register or purchase tickets for an event online, you’ll need to provide them with a booking form.
The booking form should be available on your website or a dedicated landing page. When guests land on the event page, they’ll be able to click on a link to learn more and purchase tickets for the activity.
At this point, they’ll fill out the booking form to proceed with the registration and/or transaction online.
Regardless of whether its a paid or free event, you’ll need to keep track of the number of attendees. A booking form is the first step in managing this process through your website, where guests will be able to sign up for the event.
The information collected on this form will help you provide the best guest experience possible. Aside from collecting their personal information, you can also add a field for special requests, such as asking if anyone has food allergies. Guests can then let you know ahead of time what they need or expect from your company.
How to create a DIY event booking form.
There are a few ways to create a booking form without using booking software.
Caution: Before manually creating your own booking form, though, consider that this method may leave plenty of room for human error — including the risk of overbooking.
Creating a booking form in Google Forms
Google Forms is the easiest and most common event form creator, although you’ll need a process in place to collect guest payments manually.
Step 1: Open Google Forms
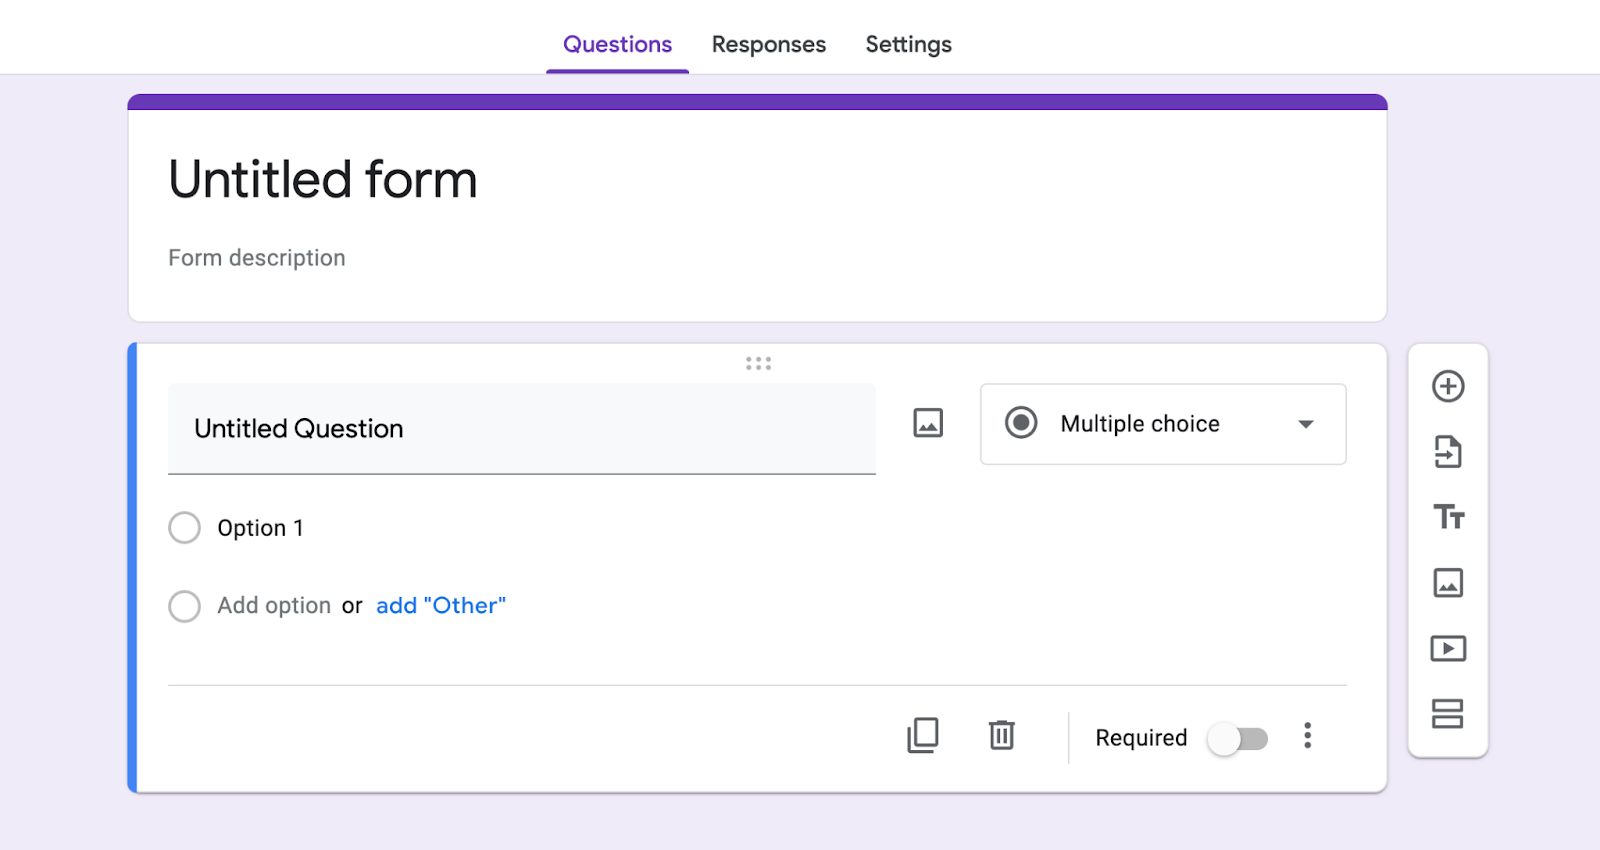
Step 2: Start a new form, and name it. Add a description if you’d like. Click the “+” on the right-hand side to add a question. From the pull-down menu on the right of the text box, choose “Short answer.”

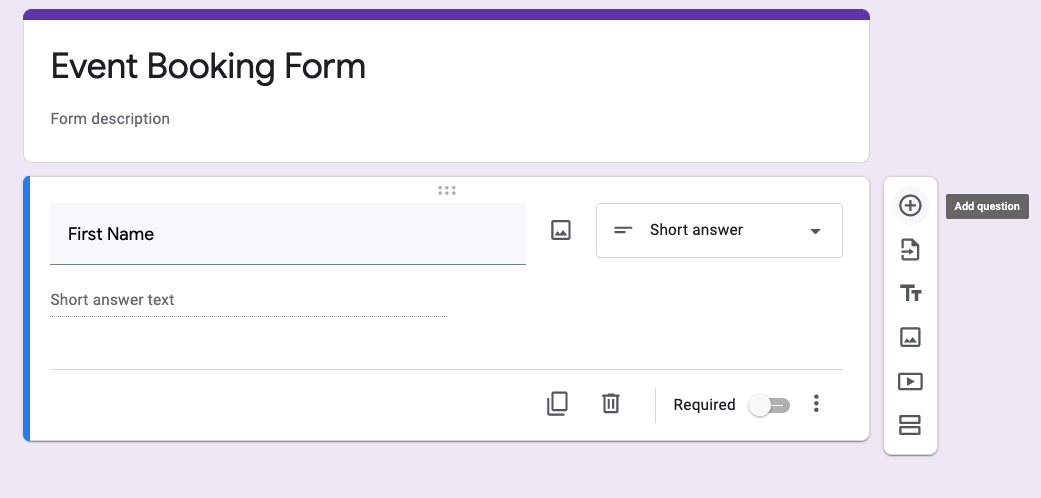
Step 3: Then, begin adding each line of information you’ll request from your guest.
This might include:
- First Name
- Last Name
- Mobile Number
- Email Address
- Event Date
- Event Time
- Number of People
- Comments/requests
Tip: Make sure to check off “Required” for the line items that guests shouldn’t skip over.
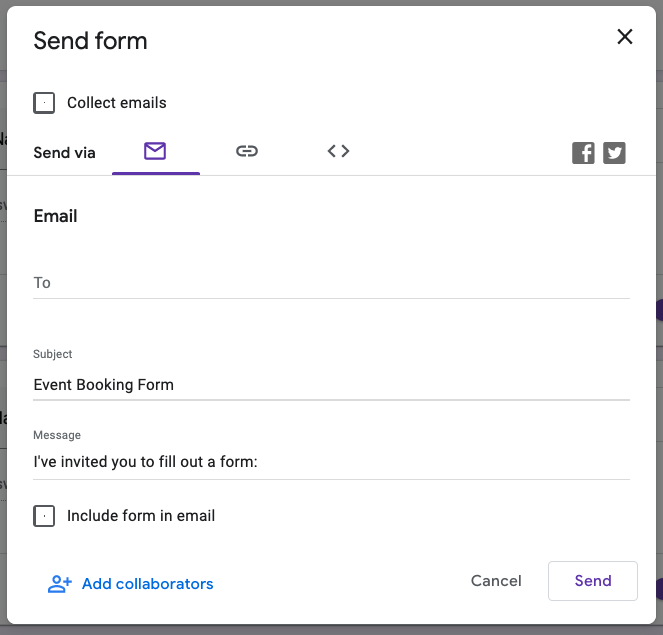
Step 4: When you’ve completed the form, click the “Send” button. You can then choose to send the form through email or share it as a link. You can also copy the Embed HTML code to add the form to your website.
Creating a booking form in Google Calendar
Creating a booking form in Google Calendar is slightly more complicated. First, you must be a Google Workspace Individual subscriber to use Google Calendar’s appointment schedules. You can then create an event schedule that can be shared with guests, but you’ll likely need to integrate that with your Google Form so guests can submit their information.

Step 1: When you open Google Calendar, click “Create +” in the top left-hand corner. Then, click “Appointment schedule.”

Step 2: Name your booking form. The title will be visible to anyone who has the link to your booking page.

Step 3: Choose an event duration, and then set the time and date for the event. You can also set a scheduling window to set how far in advance guests can book the event.

Step 4: Save your event booking form. Then, share your booking page link with guests.
Creating a booking form using a WordPress plugin
If you have a WordPress site, this plugin can help you set up a booking form directly on your website. However, you will need to download another plugin to set up online payments.
Step 1: Install and activate the WPForms plugin. Learn more about installing a plugin here.
Step 2: From your WordPress dashboard, scroll over to WPForms and click “Add New.”

Source: WPForms
Step 3: Name your form, and scroll down to the template section. Here you’ll find an online event registration template. Click “Use Template” to start building your form.
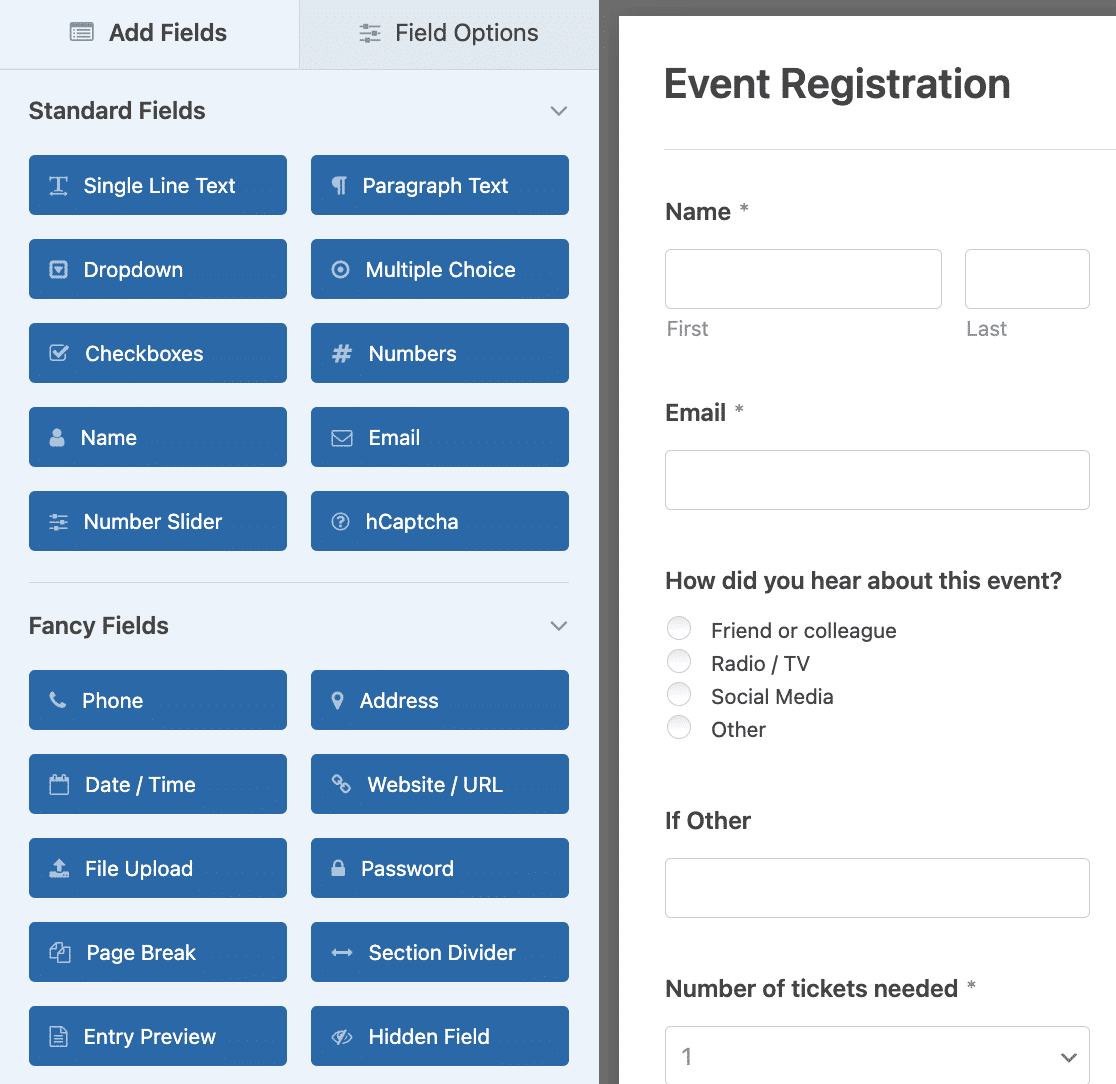
Source: WPForms
Step 4: Create your form. You can add, delete, or edit all of the template fields. To add a form field, drag the desired field from the left-hand panel to your form. The template will already come with the following line items:
- Name
- How did you hear about this event?
- Number of tickets needed
- Date/Time
Step 5: Save your form and configure your notification settings. When someone submits a form, you’ll receive a notification about it.
Step 6: Configure your form’s payment settings so that customers can pay through your website. You’ll first have to install the right payment add-on, such as PayPal or Stripe. Then, you’ll click the “Payments” tab in the form editor to integrate the plugin.
Source: WPForms
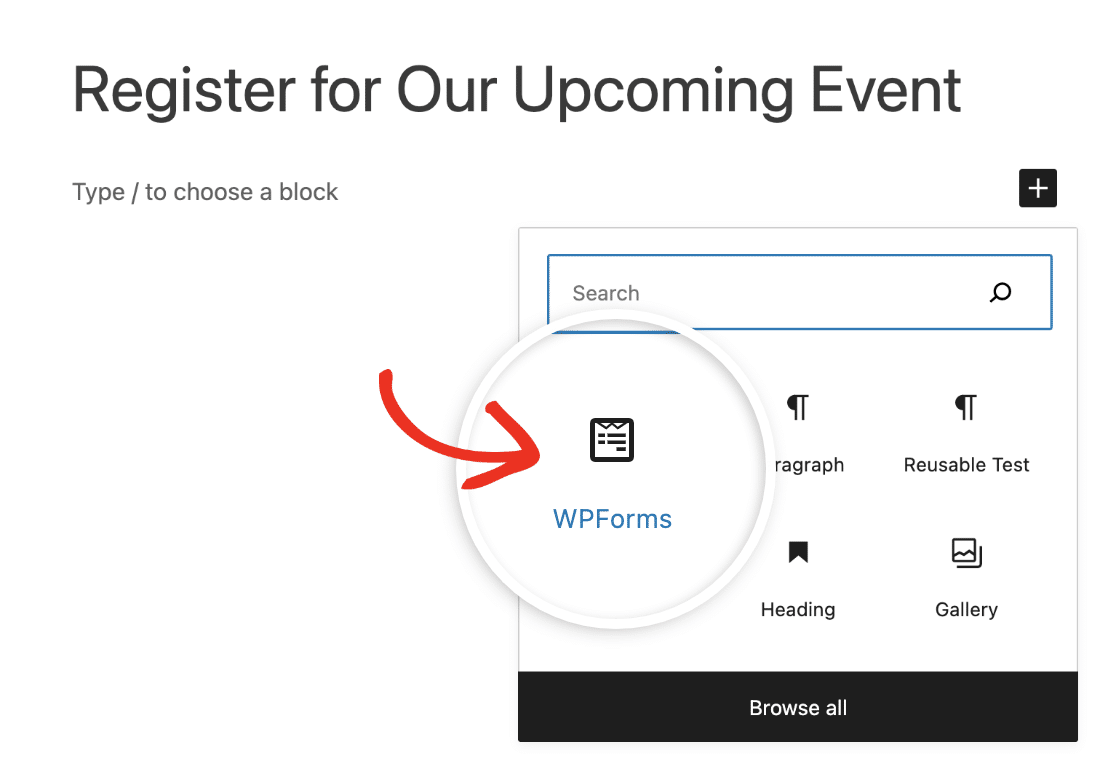
Step 7: Add the form to your site. You can add it to a blog post, new or existing page, or sidebar widget through the WordPress block editor.
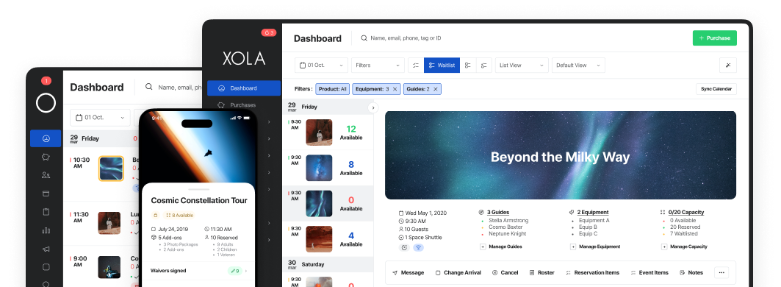
How to optimize event booking in Xola
Xola’s online booking software makes managing public and private tour and activity events easy.
When you install Xola on your website, you’ll be able to sell tours, activities, and events directly to your customers. As soon as someone clicks on your event listing, Xola’s booking form will appear. The form will collect the guest’s personal information, and they’ll be able to pay for the event right then and there.
Then Xola will get to work on the back-end. Xola will add the guest to the list of attendees, and a confirmation email will automatically be sent to them.
If your event is limited to a specific number of attendees, Xola will ensure you don’t get overbooked. You can also offer multiple private events for the same time slot, as long as you have equipment available. This allows you to use all of your vehicles, rooms, boats, etc. at the same time, which helps boost your resource utilization.
Better yet, when a guest abandons their event registration, Xola will automatically send them an email reminding them to complete the booking.
Xola makes it easy for your guests to book an event on your website, while also allowing you to manage your events more efficiently than a DIY booking form.
***
There will always be a DIY option for running your tour business. Yet it may not be the most efficient option.
Xola’s booking software can help you provide guests with a quick and secure online checkout experience while making it easy for you to keep track of event rosters on the back-end.
Are you ready to offer your guests the best possible booking experience? Give Xola a try today and watch your event bookings skyrocket.