

You could host the best snorkeling tour or run the best escape room in your city — but without a user-friendly checkout page, your booking volume won’t show it.
There are two main components to your checkout page: User interface (UI) design and user experience. In this post, we’ll talk about the UI, which refers to the visual elements that make up the look and feel of your checkout page.
From minimizing distractions to to adding a progress bar, these eight tips will help you build the best checkout UI design for your customers.
What is the ideal checkout design UI?
What’s the difference between checkout design UI and checkout UX?
Why do people abandon their carts at checkout?
8 checkout design best practices
- Stay visually consistent
- Keep branding and design elements familiar
- Make your calls to action clear
- Minimize distractions
- Notify consumers if something is wrong
- Use visual cues and security badges to instill confidence at checkout
- Use relevant input fields
What is the ideal checkout design UI?
A smooth UI is clean, organized, and easy to interact with. The calls to action are familiar, and they’re placed in predictable locations where your guests expect them to be. There are no distractions once they enter the checkout process, allowing the user to 100% focus on the task at hand.
What’s the difference between checkout design UI and checkout UX?
User interface (UI) design refers to the elements that make up the look and feel of a digital product, such as your checkout page. The UI design defines how guests interact with your checkout flow from start to finish. The screens they browse through, the buttons they click, and the form fields they fill out all make up your website’s user interface.
For example, creating a one-page checkout page is a UI design tactic that makes the checkout process feel very manageable for guests, especially those booking on a mobile phone.
The user experience (UX), on the other hand, considers the user’s needs, goals, and pain points when it comes to the whole checkout experience. It goes beyond the visual and interactive elements on your checkout page. UX design considers what guests want in a checkout process and how they feel about it after.
From a UX design standpoint, allowing guest checkout is a great way to speed up the checkout process for users.
Meanwhile, UI design is the process of designing a seamless checkout experience that’ll increase conversions and leave guests feeling happy about booking with your company.
Why do people abandon their carts at checkout?
The travel industry has one of the highest cart abandonment rates: About 80% of visitors will leave a website before completing their travel booking. These are the top reasons why:
- Extra costs: Nearly half (48%) of online shoppers abandon their carts because they find extra costs like taxes or fees.
- Broken discount codes: About 46% of shoppers will abandon their cart if a discount code doesn’t work.
- Re-entering information: Nearly a third of customers (30%) abandon an online purchase if they have to re-enter their credit card information
- Just looking: Nearly 40% of travelers abandon a booking because they were just looking or want to do more research.
- Prices are too high: Another 37% of customers leave because they felt the price was too high and want to compare prices on another website.
- No guest checkout: Nearly a quarter (24%) of people will abandon a purchase if the website requires them to create an account.
- A second opinion: 21% leave because they need to check with other travelers.
- Too long or complicated: 13% of people will abandon a travel booking if the checkout process is too long or too complicated.
- Technical issues: 9% leave due to technical issues or a lost connection.
- Meanwhile, 11% of shoppers will leave a booking incomplete if there is no “guest checkout” option.
- Payment options: About 7% leave because of a payment issue. For example, if they don’t find their preferred payment method at checkout.
8 checkout design best practices
Now that we’ve learned about the different reasons your guests might abandon their booking, let’s take a look at the eight best practices to follow when designing your checkout page.
1. Stay visually consistent
Consistency is a determining factor in UI design. Tour operators should strive to create a checkout page that’s visually consistent with the rest of their website. The fonts, colors, and buttons should match your brand so that guests can quickly identify that they’re on your website’s checkout page.
For instance, if the booking button on your homepage is green, there’s no reason to make it red on your checkout page. This could confuse your guests, who have already associated the green button with the action of making a booking.
The user experience should also remain consistent throughout. If your website loads quickly, for example, the checkout page should load just as fast.
2. Keep branding and design elements familiar
Your guests are already familiar with certain UI elements, such as the “Book Now” or “Confirm Payment” buttons. They’re likely expecting to find the booking button above the fold on your website (visible without the need to scroll down). The two most common placements for these buttons are at the top or at the center of the page — if guests don’t find the button there, you’re making them search for it.
Another example is your navigation menu. Customers are probably expecting to find a link to your tour pages there. When they don’t, you automatically introduce a bit of friction in their customer journey. The more elements your customer needs to click on to make a booking, the less seamless the journey becomes.
In this case, familiarity creates a more user-friendly experience.
3. Make your calls to action clear
There’s nothing more frustrating for an online shopper than not being able to locate the “cart” or “checkout” button. Users can easily miss these call-to-action buttons if they don’t jump out at them, especially if they’re using a mobile phone.
Avoid any confusion by choosing a different color and font for your most important call-to-actions, ensuring they stand out from the rest of your page elements.
For example, many operators choose to make the “Pay now” button a bright color, such as green. The color green is a great choice because it psychologically signifies “go!” — and the shopper took action.
4. Minimize distractions
Even the slightest distraction can deter a customer from clicking “Finalize my booking.” From a design standpoint, the ideal checkout page is clean and well-organized with no distracting elements.
Your checkout page isn’t the place to introduce new information, which is why sidebars or pop-up ads should be avoided. You want to strive to keep the customer on the path to success. A sidebar may grab their attention and take them to another part of your site, and a pop-up ad will disrupt the action they’re currently on.
5. Notify consumers if something is wrong
Feedback is a key user-friendly element in the checkout process. Website visitors should be notified when something goes wrong. For example, if someone tries to type their name into the phone number field, they’d be notified right away. Real-time form validation lets users know as soon as they enter the wrong input into a form field. That way, they can fix the issue before going on to the the next step, which helps eliminate any friction moving forward.
6. Add a progress bar
When guests initiate their checkout, a progress bar should show them how many steps are involved in the booking process. As they move through each step, the progress bar will indicate their progression, giving them more of an incentive to follow through.
7. Use visual cues and security badges to instill confidence at checkout
A first-time guest likely doesn’t know much about your brand, and they may feel a little hesitant to hand over their credit card information. There are several ways to instill trust in your new customers, such as displaying positive reviews and relevant safety badges (like Tripadvisor) on your homepage.

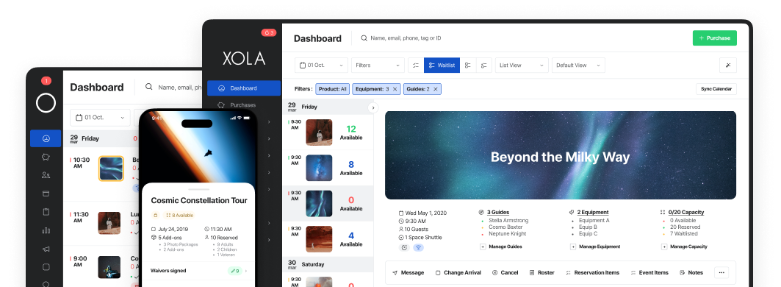
When they arrive on your checkout page, you can also use visual cues to ease customers’ minds at checkout. For example, all Xola clients’ checkout pages display the security badge shown above. The green lock signifies a “secure” checkout, and the words “Secure SSL encryption” further solidify that.
SSL certificates and secure payment badges can make a big impact on your guests, giving them the confidence needed to share their payment information. You might also apply for relevant trust badges, such as with Tripadvisor, to give your site even more credibility.
Display these prominently throughout the checkout process to make your guests feel more at ease.
8. Use relevant input fields
Not all of your input fields will require text. Customize your form fields so that guests are given the correct input option when it’s time to share their phone number, email address, and payment information.
For example, guests could choose the date of their experience on a calendar, rather than typing out the actual date. If you need to ask for a guest’s age, you can use a drop-down menu that starts with the minimum age to join the tour. And for payment information, guests should only be able to type in numbers in the credit card form field.
This eases the process of having to fill out several different form fields, especially if they’re booking on their phones.
***
By following these nine checkout design UI tips, you can create a seamless and intuitive experience for your customers. A smoother checkout flow will lead to higher conversion rates and customer satisfaction.
Remember to keep the checkout process as simple and straightforward as possible, minimize distractions and unnecessary fields, and make sure the page is mobile-friendly.
Paying attention to these details will help you optimize your checkout page and improve your website’s conversion rates.